
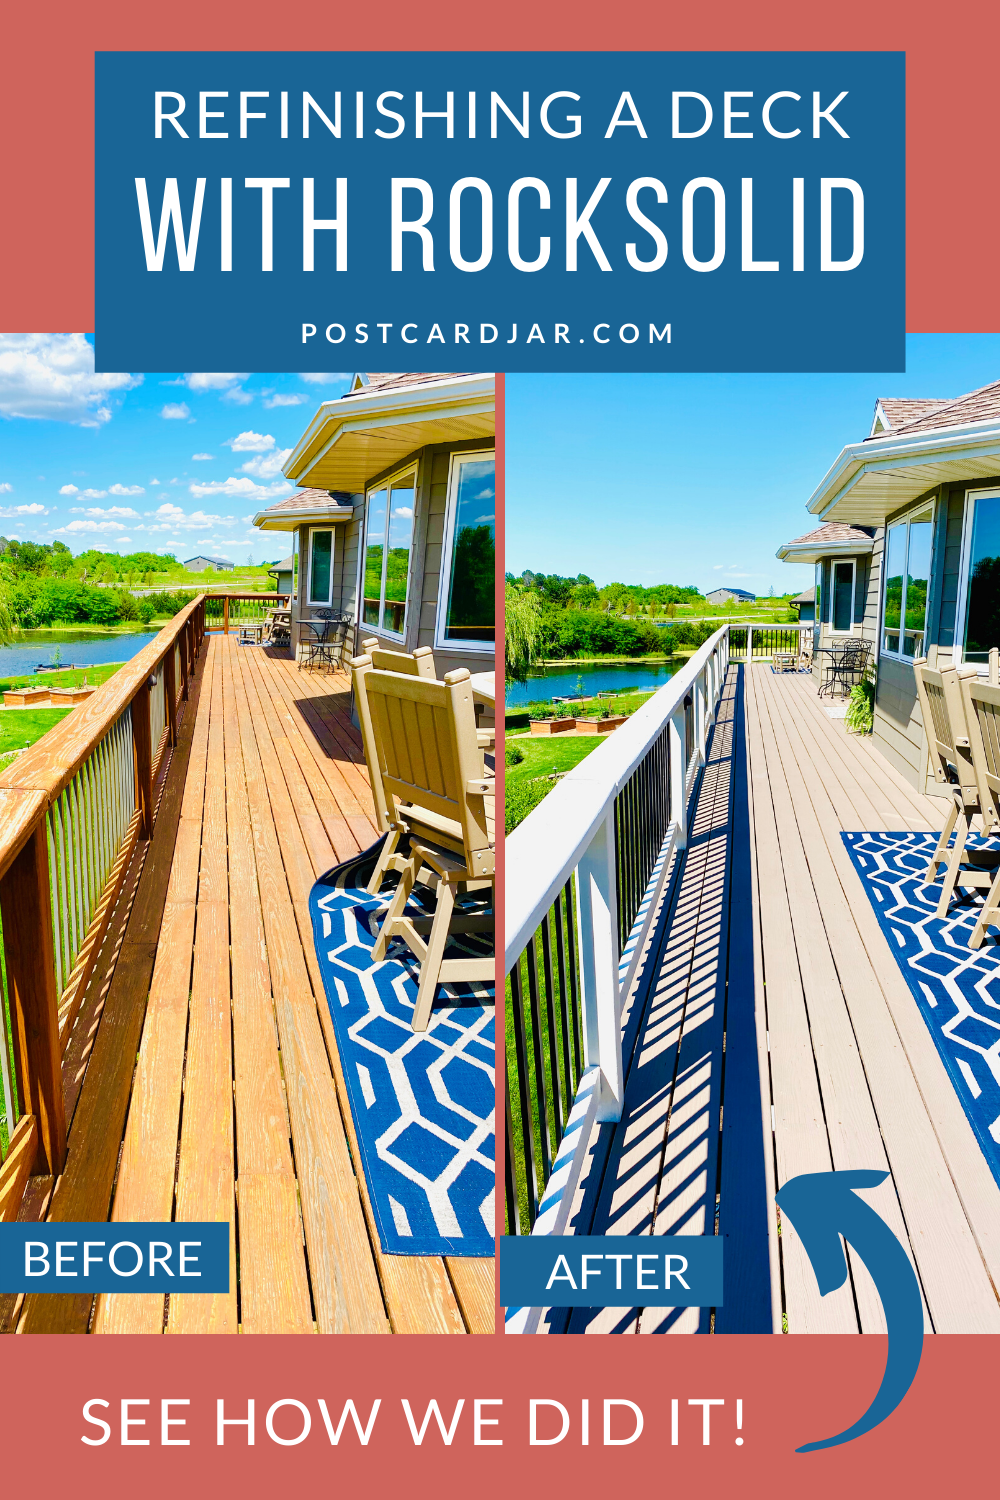
It took some time and a lot of hard work, but with the help of our friend, Gio, we finally finished our 70-foot deck renovation with Rustoleum RockSolid Deck Resurfacer!
If you’re a regular follower of our Instagram and Facebook stories (thank you), you know that we recently renovated our huge wooden deck.
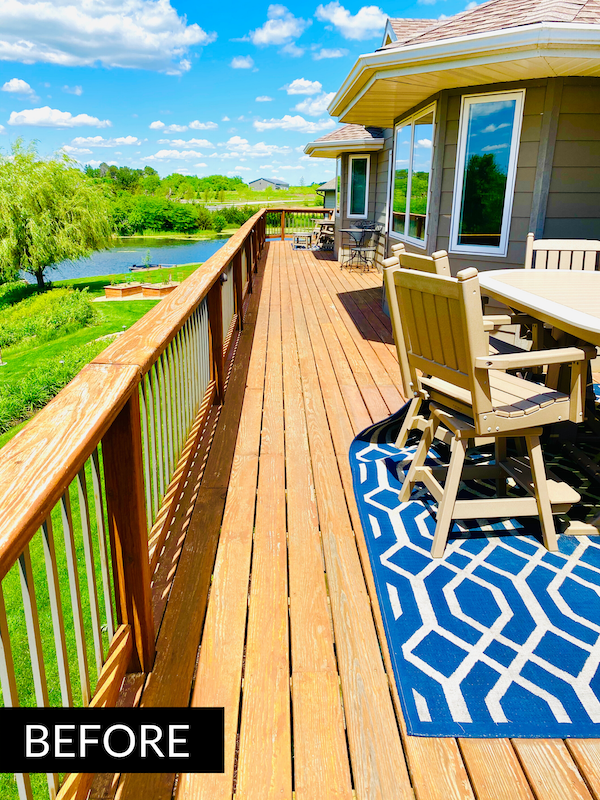
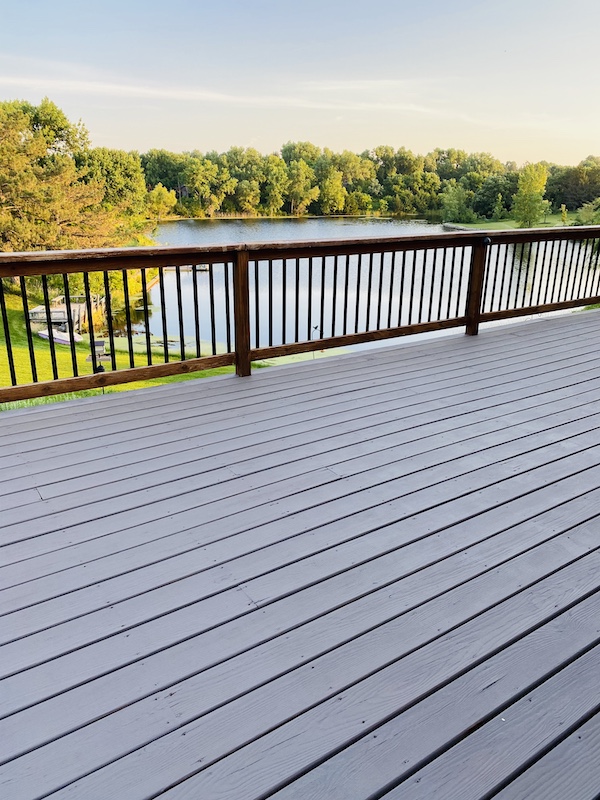
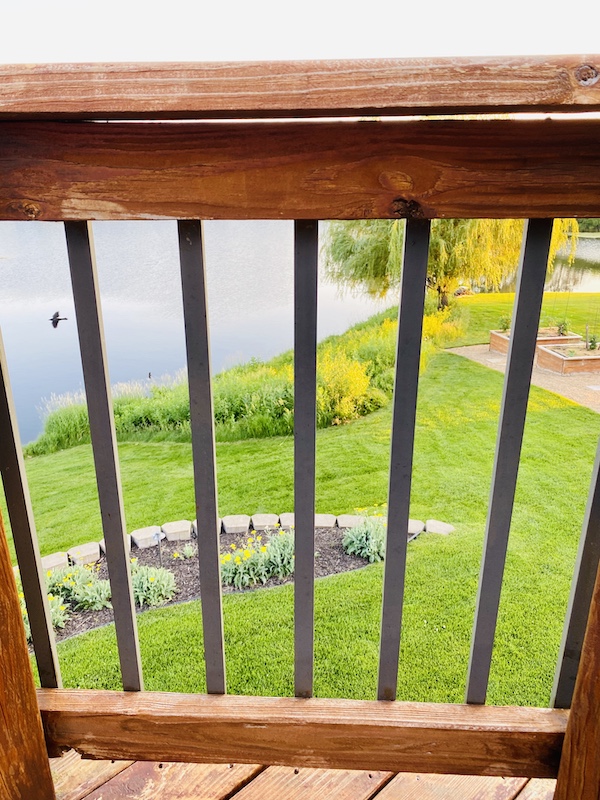
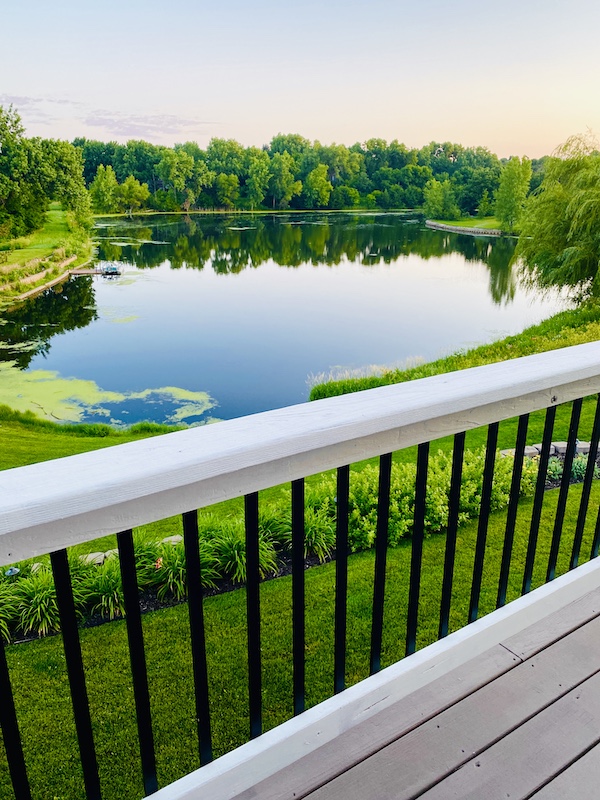
When we bought our home in Crete, Nebr., one of the features that convinced us to buy it was the 70-foot deck that runs the length of the back of the home. Three seasons out of the year, we’re able to enjoy this beautiful 1,000 sq. foot space that overlooks a small reservoir. Our deck is ideal for large gatherings and we’ve used it time and time again to host dinner parties. We also have hosted family celebrations, graduations, and bridal showers.
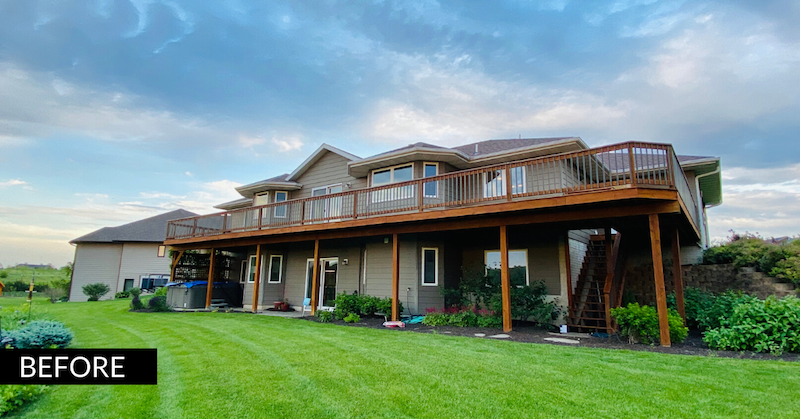
Decks, though, require maintenance. Ours is made from wood, so it’s important to keep it waterproofed so it doesn’t rot. Over the years we’ve re-stained it a number of times, but each time the waterproofing has worn off after just a season or two.
So this year, we thought we’d try something different. We contacted the friendly folks at Crete Ace Hardware store, and they recommended we try a Rustoleum product called RockSolid Deck Resurfacer. We measured the deck, railings, and support structure and realized that we would need to cover more than 1,500 square feet of surface with paint. Yikes!
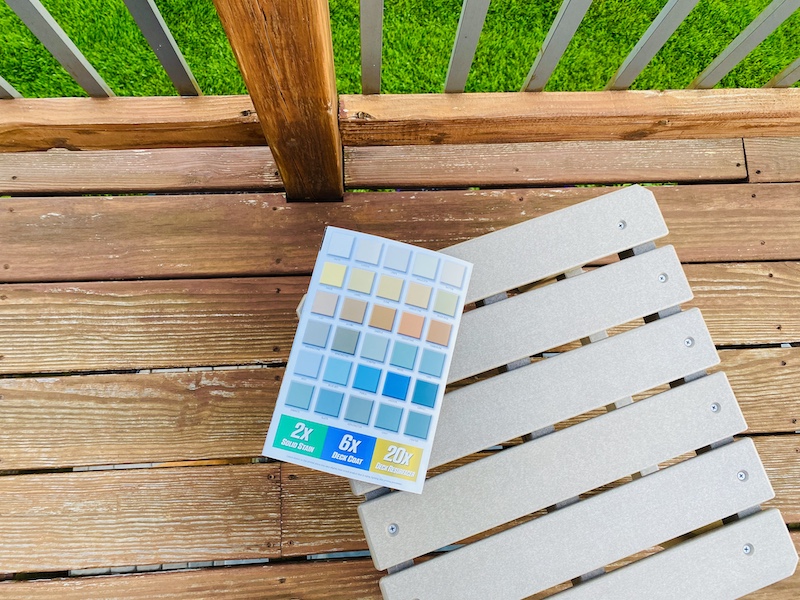
Choosing a RockSolid Deck Resurfacer color
When it came to choosing a color, we decided (with the help of our IG followers) to go with “Winchester.” It seemed to be a few shades darker than our siding on the house and a bit darker than our deck furniture. Note: When we put this color on, it was much lighter than it seemed in the brochure but we decided to stick with it as we liked the result.
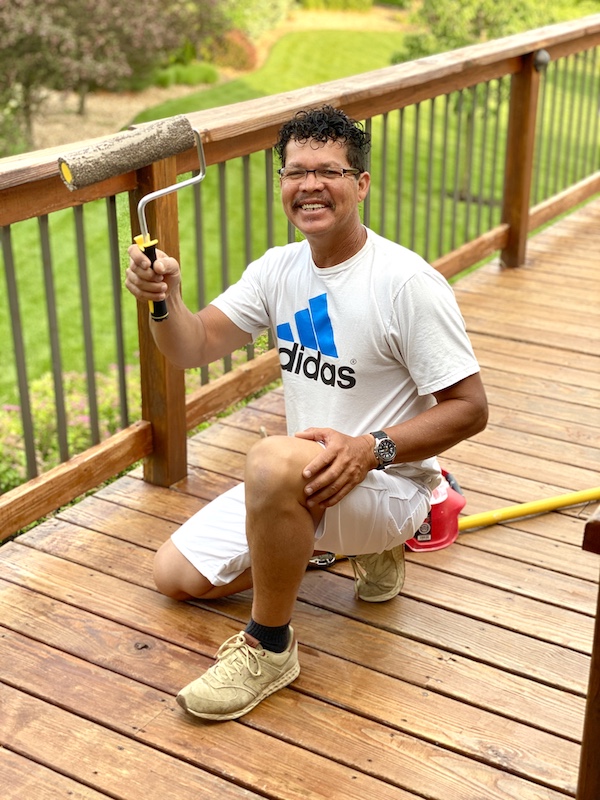
Time to call in the professional
We knew pretty quickly that we were going to need a professional for a job this big. So, we called our friend and expert painter, Gio Soliano, from Pawhuska, Okla., and arranged a week for him to come to Crete to help us out. He has painted most of our house in Pawhuska and we knew he’d do a great job. And let’s face it, we’ve missed him.
Prepping with Rustoleum Deck Start Wood Primer
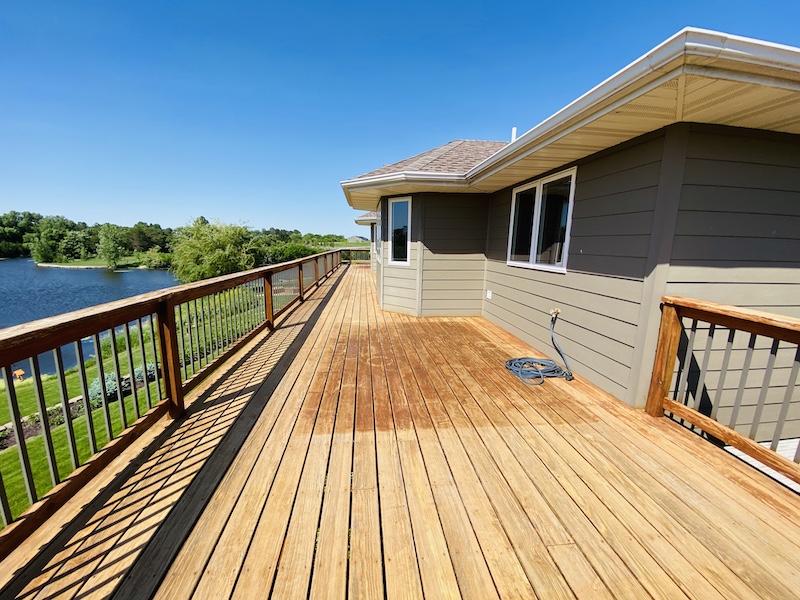
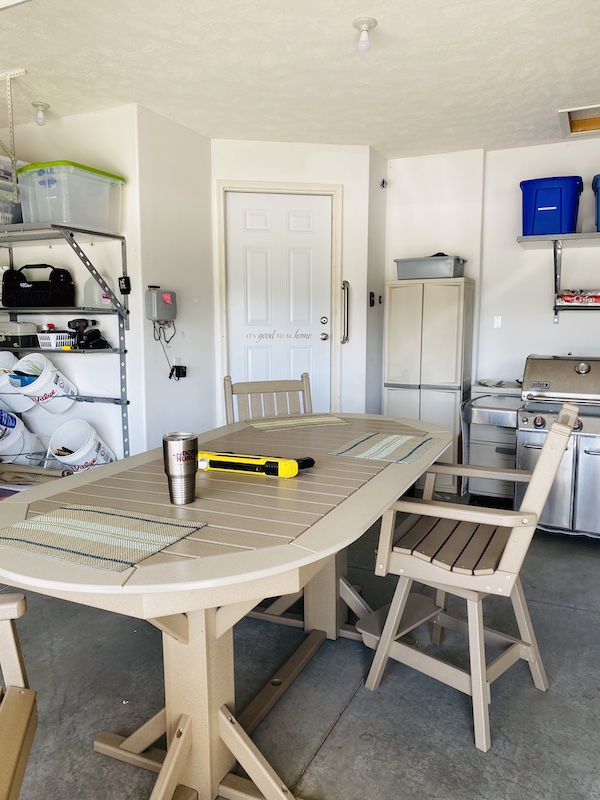
But before Gio came, we had to prep the deck. First, we removed all of our deck furniture and rugs and stored those in the garage. (We actually had to clean the garage out before starting the project so it could accommodate the extra stuff.) This would also make it possible for us to share meals together with Gio while social distancing with lots of air flow from the outdoors.
Our neighbor, Brad, was kind enough to lend us his gas powered power washer and scrubbing attachment for the first step, and we went to work.

It took a couple of hours but we soon had all the deck and railing surfaces washed. And as long as we had a power washer, we also gave all of our deck rugs a good cleaning.
Cleaning with Rustoleum RockSolid Deck & Patio Cleaner
Next, we cleaned the deck using Rustoleum RockSolid Deck & Patio Cleaner. This step was super easy. We just mixed the concentrate with water, sprayed it on the deck from a garden sprayer, and then rinsed it off.
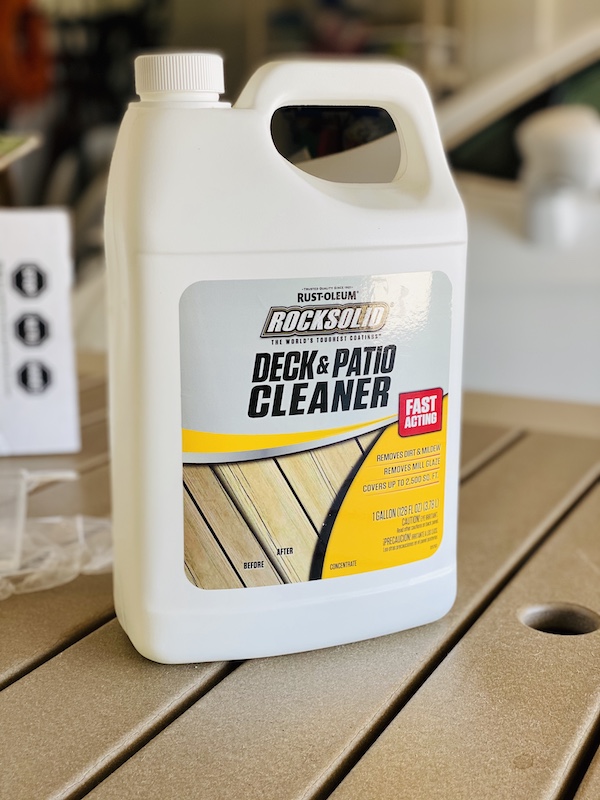
There were a few mossy places we brushed with a broom, but overall, it was pretty simple.
Painting the deck with Rustoleum RockSolid Deck Resurfacer
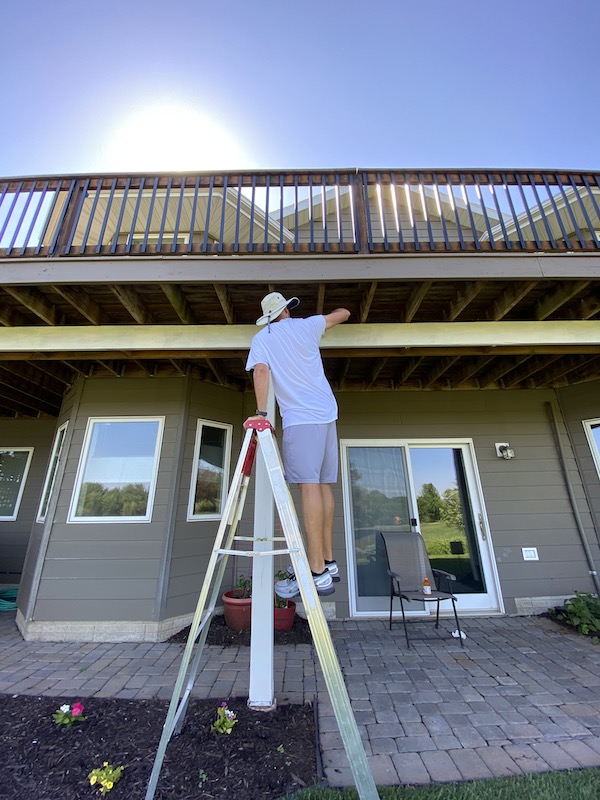
The next day, Gio came and we got started on the harder parts of our deck renovation. He first had to prime the floor, railings, stairs, and under structure with the RockSolid Deck Start Wood Primer. He knocked this step out in one afternoon. The next morning, he got to work on painting the floor.
He applied the Rustoleum RockSolid Deck Resurfacer 6X paint between the boards with a brush and then applied paint to the flat surfaces with a roller. The temperature was between 76-90 degrees most of the morning and it was windy, so the paint dried VERY quickly. I’m talking within minutes.
Now, about the railing on our deck
So, the railing was the most difficult part of this entire deck renovation. We had decided to paint the wooden parts of the railing white and leave the dark grey balusters as they were. However, once Gio arrived, he quickly noticed that there were lots of marks on the balusters from previous re-stainings of the deck and pointed out they would be even more noticeable once the railings were painted white.
So, the balusters also had to be painted. Gio suggested removing the balusters and spray painting them in the garage. But there’s a catch: each baluster has 4 screws on the outside of the railing and there are 322 balusters!

Then, about the time we needed to make a decision on painting the balusters, the forecast started calling for thunderstorms later in the week which gave us a strict deadline. Steve had doubts we would have time to take them all off and put them back on in time, and talked Gio out of that idea.
Spray painting the balusters black
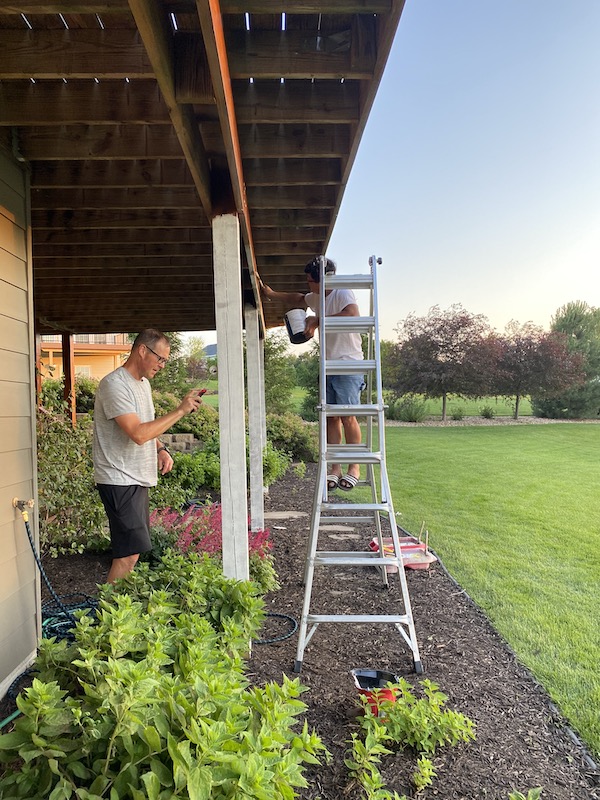
Instead, we put a piece of cardboard behind each baluster and spray painted it black. Then, we were going to paint the deck rails white. Not an easy job, especially on a windy day. But Gio and Ann got them all spray painted best they could while Steve painted the facings under the deck,
Gio knows best
The next morning when Gio went to paint the railings white, there was a big problem. It was super windy that day and the white paint kept blowing onto the black balusters. Gio had had enough. He got an electric screwdriver and started removing the balusters one at a time, until he had all 322 off!
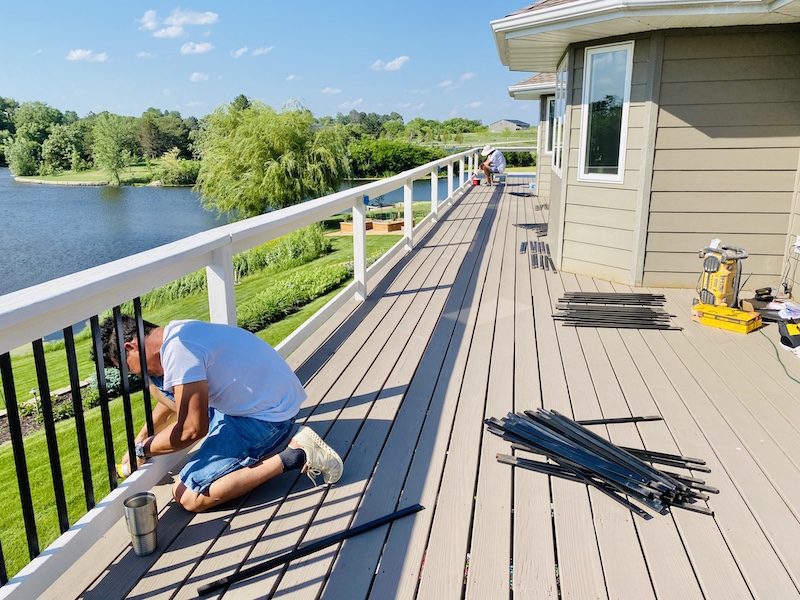
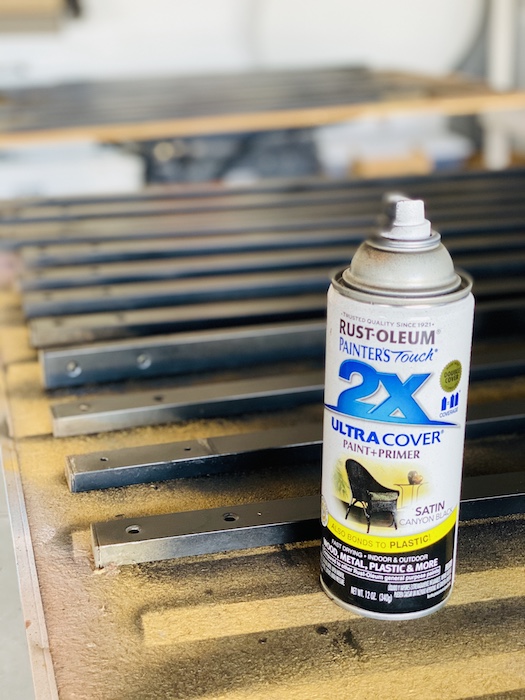
Once off, we noticed lots of places on the balusters we’d missed with the spray paint, so Ann took them pile by pile to the garage and repainted most of them with Rustoleum 2X ultra cover paint + primer. We went through 11 cans of spray paint to get a nice black finish on all 322 balusters.
A race against the weather
In a race against the sun, heat, and rain, Gio and Steve painted the railings and the support beams under the deck with superhero speed.
We chose “linen” as the color for the railings and under deck support beams. The Rustoleum RockSolid Deck Resurfacer worked great, but the light color needed three coats to cover the dark cedar stain. Thankfully, the paint dried very quickly so we were able to put on the next coat quickly.

The three of us worked 15 hours straight that day, but finally, the painting was FINISHED! We had supper in the garage (while social distancing) and called it a night.

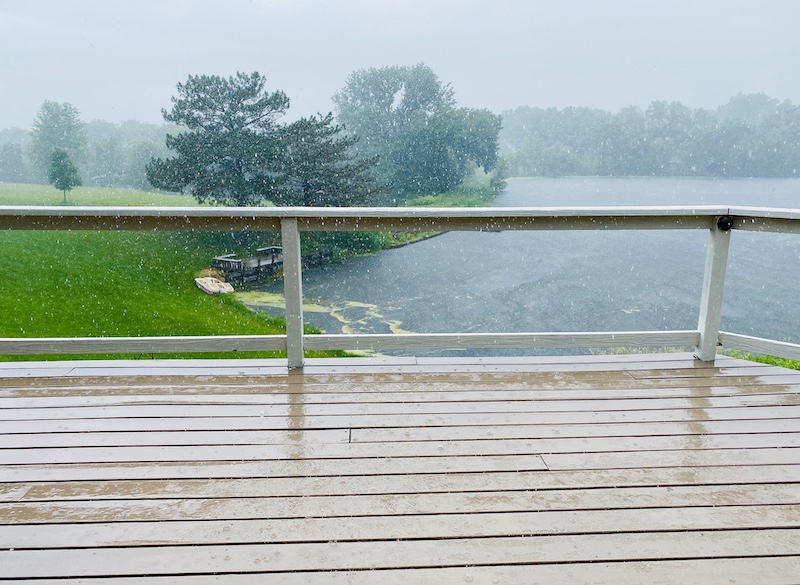
The RockSolid Deck Resurfacer works!
The next day, it not only rained, but it poured. Fortunately, the Nebraska heat had dried the Rustoleum RockSolid deck resurfacer and everything was protected from the rain. It held up great and repelled the water just like we’d hoped it would.
Finishing our renovation with RockSolid Deck Resurfacer
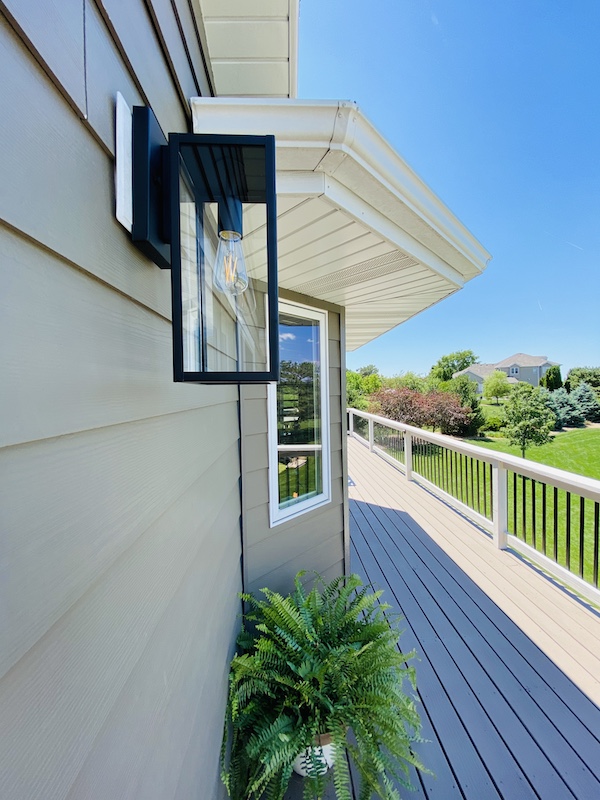
The day after the rain, we touched up a few spots and Gio finished installing the 322 balusters (that’s 1,288 screws). He also helped us install new lighting fixtures on the outside of the house which made a huge difference.
Late in the week, Gio’s family drove from Oklahoma to Nebraska to see his work and enjoy a bit of a getaway after being stuck at home for several months. It was so fantastic to see them all.

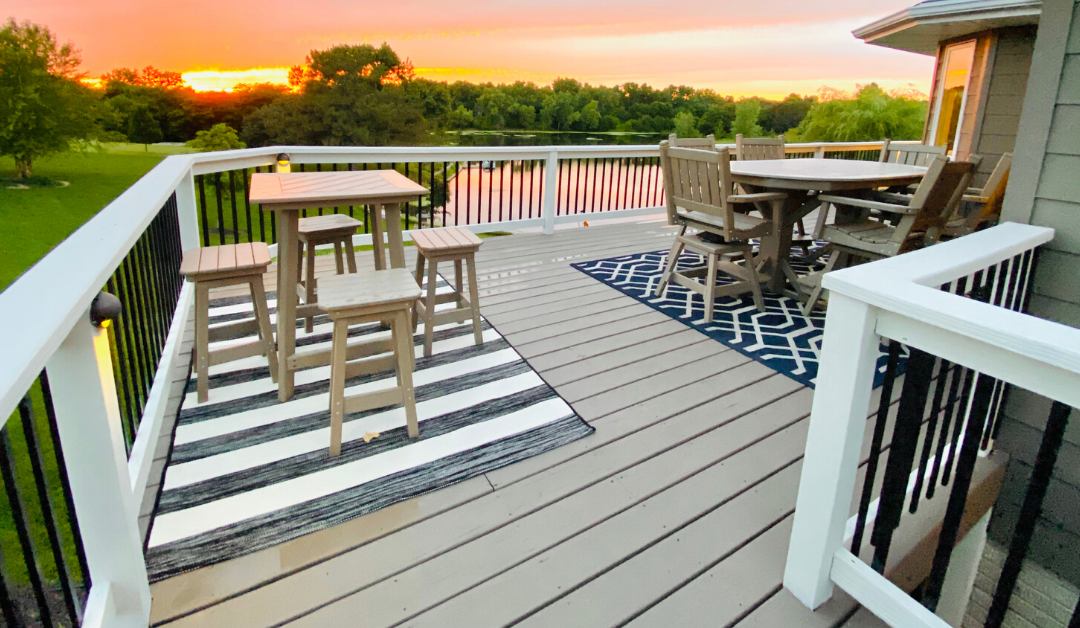
We moved the furniture back to the deck and enjoyed a nice meal outside as we watched the sun set over the reservoir. This deck renovation was a lot of work, but we are very pleased with the results. Take a look.
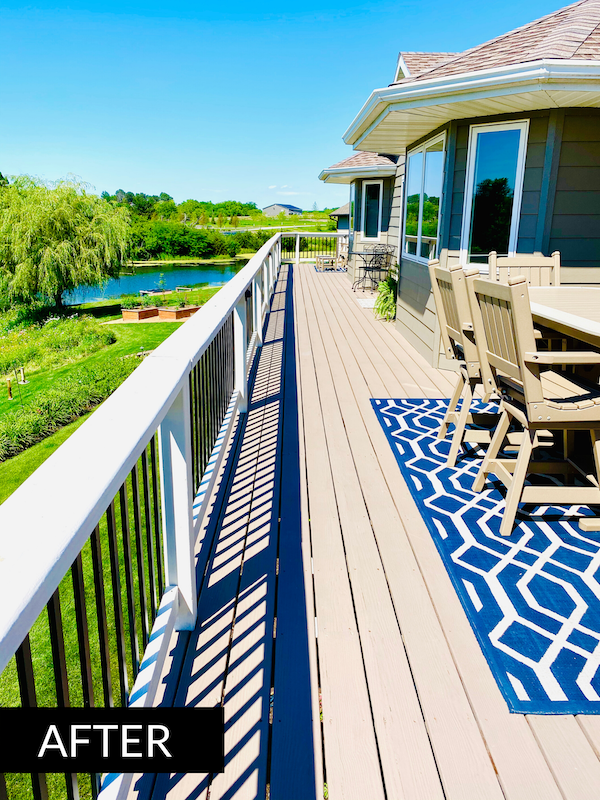
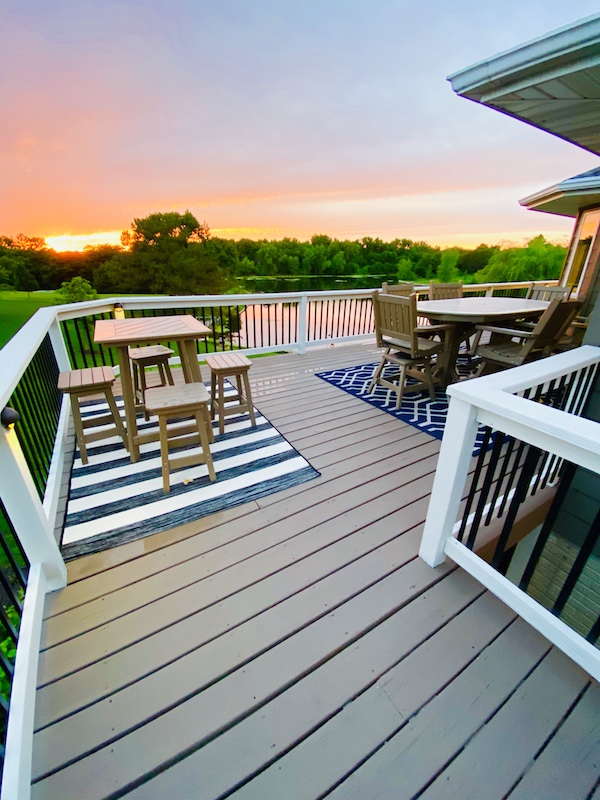
It is just amazing what a difference these new colors make. So far, we’re impressed with the Rustoleum RockSolid deck resurfacer and would recommend it (this is not a paid ad). It has given our deck a fresh, new look and we can’t wait until it’s safe (we did this during the coronavirus pandemic) to have more people over to enjoy it.
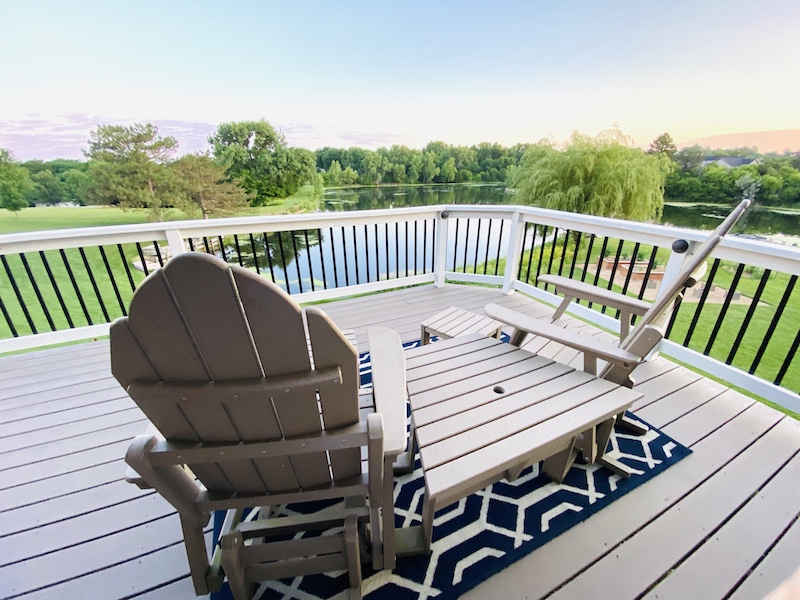
In the meantime, we’re enjoying coffee on the deck in the mornings and dinners outside on cooler evenings.
Many thanks to Dan and everyone at Crete Ace Hardware for their help and expertise. And a very special thank you to our friend, Gio, for making the trip to Nebraska, putting up with us, and giving us the deck of our dreams. We are so grateful to have this beautiful outdoor space to enjoy. It reminds us daily that while we love to travel, it’s also a blessing to be safe at home.

Update summer 2021
It has been a little more than a year since we finished our deck project. We wanted to let you know that the product has held up extremely well. So far we’ve seen no signs of chipping or cracking, and the waterproofing remains as good today as it was when it was newly finished.


Rustoleum Rock Solid was an absolute waste of time, labor and money for us. All insttructions were followed i.e. weather conditions, surface prep (scraped, sanded, primed). using Rustoleum’s recommended deck wash and primer. After 2 days time the paint began to bubble. I am now using a floor sceaper and the paint comes off verg easily in sheets. Terrible product which us subject of a class-action suit. There are many, many who have had the same terrible and expensive experiences! BEWARE!
Wow! I’m so sorry to hear this. So far, we have not had any of those issues and our deck paint still looks just like it did when we applied it nine months ago.
I used it 4 or 5 years ago and it just started peeling up last year. Took pressure washer to it this past weekend and blew most of it off. Even though it peeled it had to be the best coverage of any product I have ever used. It did rot a few boards in that time also but I am looking into a Cabot product to apply this year. Decks are difficult to have!
We are sorry to hear that. So far, ours is looking great!
I agree terrible product. We have had peeling after 1 year.
Ours had done great through a hot summer, cold fall, and a lot of ice and snow this winter. No peeling at all. I’m sorry you had a bad experience.
From the mind of a nationally well-known artist: Hate the white, looks horrid with black pickets. Overall color choice looks amateur and tacky. Why cover those beautiful cedar colors with a palette of dull dirt? Sorry, but it looks like crap and, as an artist, I’d wouldn’t show this huge mistake to anyone. But thanks for the tutorial.
We’re just two hard-working people trying to do their best to take care of our home and create a place that we like and enjoy. The good news is, you don’t have to live here or look our deck. Glad you enjoyed the free tutorial.
What a hater !!!!!
The white and black look great together.
Haters gonna hate. 🙂 Thanks.
Can you share where you bought your new outdoor lights?
We purchased them through Wayfair. Several months later, we are still loving them and what a difference they make! Here’s a link.
https://www.wayfair.com/lighting/pdp/foundstone-andalucia-matte-black-1-bulb-1476-h-outdoor-wall-lantern-w003221142.html?&experiencetype=2&selectedvertical=3
It is just beautiful!! You ALL did a terrific job! Enjoy!!
Thank you so much for the kind words, Deb!
Your home looks amazing!!! How blessed you are to have such a beautiful view😍😍
Thank you, Pam. We don’t take it for granted, we assure you.
Can I ask why you chose this brand over sherwin Williams porch and floor paint? Your deck looks amazing!
Thanks for asking. We took the advice of our friends at Ace Hardware who have a lot more knowledge about reliable products than we did. They had seen good results with these Rustoleum products and after doing some online research ourselves, we thought it would be a good product for our deck. So far, we love it!
Looks amazing you guys! All your hard work can now be enjoyed!!!💗💗💗
That’s right, Kristi! We are looking forward to many hours of relaxation and enjoyment on the deck.
It looks just beautiful! I’m amazed at your steadfastness in seeing this huge task through to the end!
Thanks, Sue. It was one of those things, once we got started, there was no going back! 🙂